Exterior
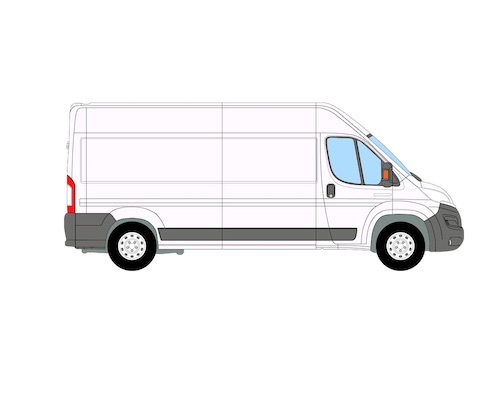
Exterior
The external bits added to the van to help make life easy and the bits required to make other things work!
From windows to solar panels, you can add a few bits to look 'stealthy' or lots to look like a proper camper van. It all depends on what you want and how it will work for you.
Solar Panels
Solar panels come in many sizes and types. I'm not going to go into any detail as many people have already done a better job so, check out Mobile Solar Power and the YouTube videos by Will for loads on solar power.
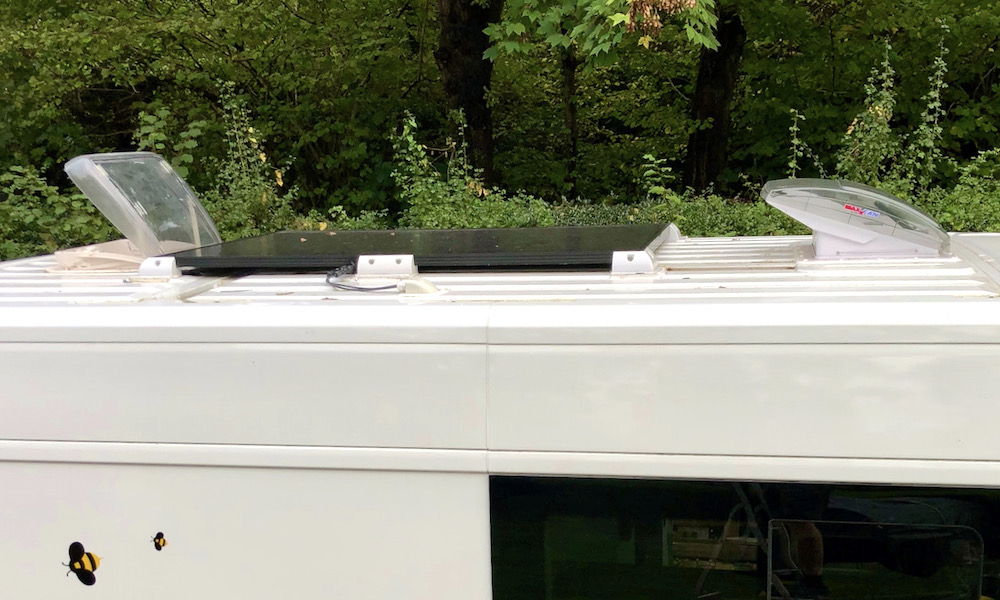
I chose a large 320 watt rigid panel fixed to the roof on 6 plastic (ABS I think) mounts that were bonded to the roof with Sika adhesive. The roof was cleaned, etched and primed before the adhesive was used so that is not going anywhere. The panel was bolted to the mounts using stainless steel bolts so that I can change it if required. I hope I don't get too much galvanic corrosion between the bolts and aluminium frame.
The solar panel is connected to a Votronic MPP solar controller and a solar computer, good solid German engineering.
Solar Panels
Having sized the battery requirements based on no additional charging, I then looked at what size of solar panel I would need to help top up the battery.
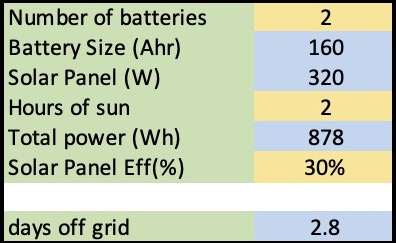
To do this I did a simple calculation. I knew that 878 watts of consumption will last 2 days with 320 Ah of battery power (discharging to 50%). I know that I need the largest panel I can fit on the roof, I found a 320 W single panel. So, assuming that I only get 2 hours a day of good sunlight ( a reasonable assumption looking at lots of sunshine maps) and that I only get 30% of the rated solar power (more on this later). Then I can last nearly a whole day extra due to the solar panel charging my battery.
Now why did I only assume 30% efficiency??
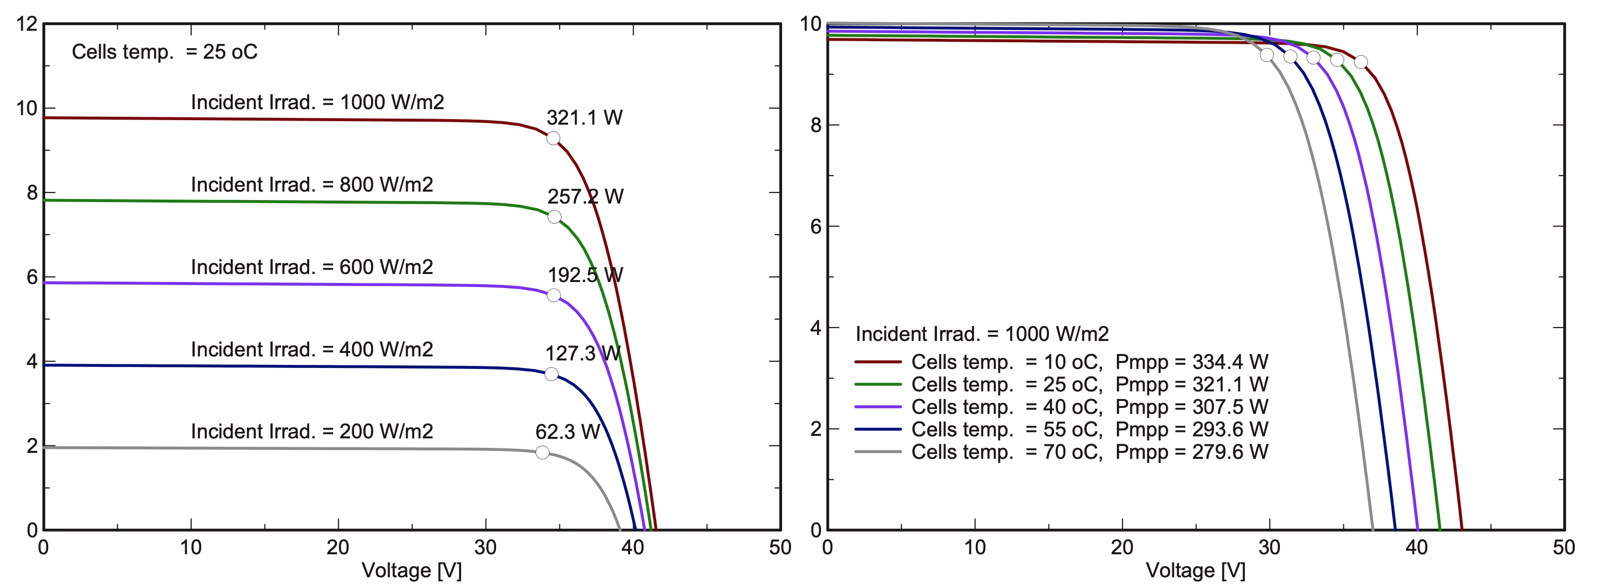
Solar panel output is the maximum that you will get from a new clean panel with 1000 w/m2 of solar irradiation hitting it at 90˚ to the sun. The power is roughly proportional to the solar intensity so, depending on where you are in the world and the time of day the solar irradiance can be between 200 and 1000 w/m2 . My panel may only output 20% in winter at 60˚ Lat.
This gets even worse when you start to think about mounting your panel on your van.
Do I mount flat (easy) or tilt it (hard). Solar farms are all tilted towards the sun so that must be the best thing to do!
Rather than just take the easy option I did a bit of leg work to see how much better tilted arrays are on vans.
Now for some fun science and maths (great I hear you say).
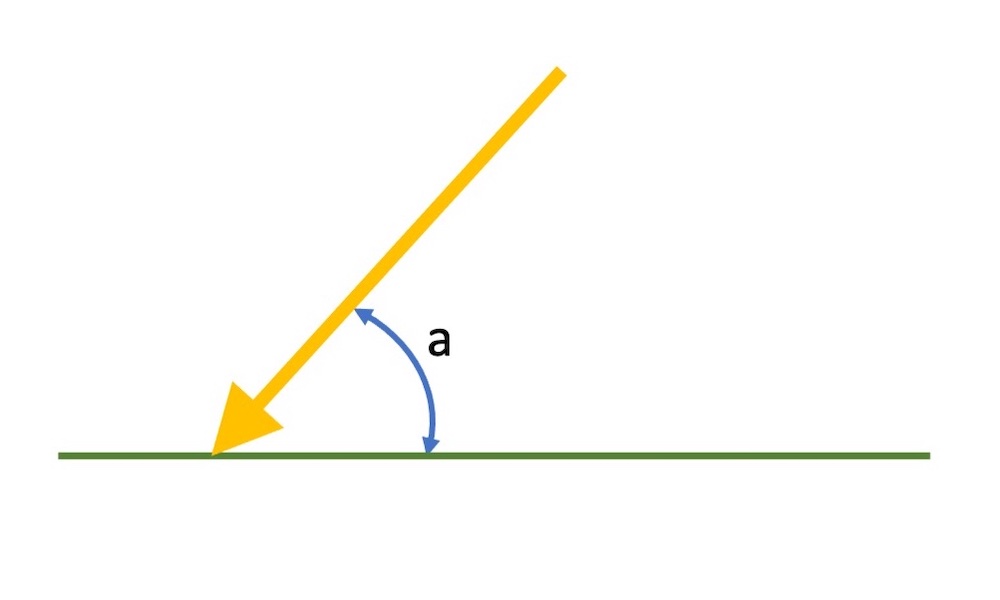
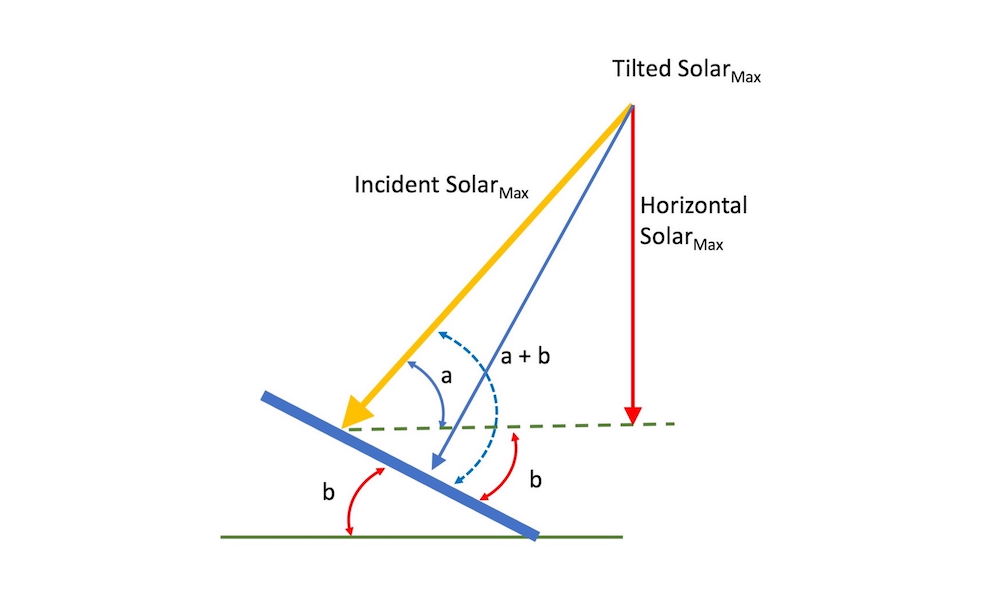
The suns ray hit the solar panel at an angle "a". In an ideal situation this should be 90˚ to get maximum power.
You can calculate the amount of power that reaches your solar panel if it is at an angle (or horizontal).
If you place your panel at an angle "b" through the magic of maths you can work out the vectors using algebra and trigonometry. This will then give you the values of the solar power on your tilted and horizontal panel.
I then looked at the areas in Europe where we will be travelling and it worked out quite nicely that we are in UK at about 50˚ Lat and Oslo is at 60˚ Lat and Madrid is at 40˚ Lat.
I then looked at the solar radiation values and the elevation of the sun (angle a from earlier). The panel would have to be mounted at 90˚ - a so that the sun was at the maximum power position. This is when I realised that unless you have an infinitely adjustable system then this is just impractical. Madrid in summer would be 17˚ and Oslo in winter 83˚. A compromise of 40˚ is the mid-point for London and therefore would work well for Oslo and Madrid.
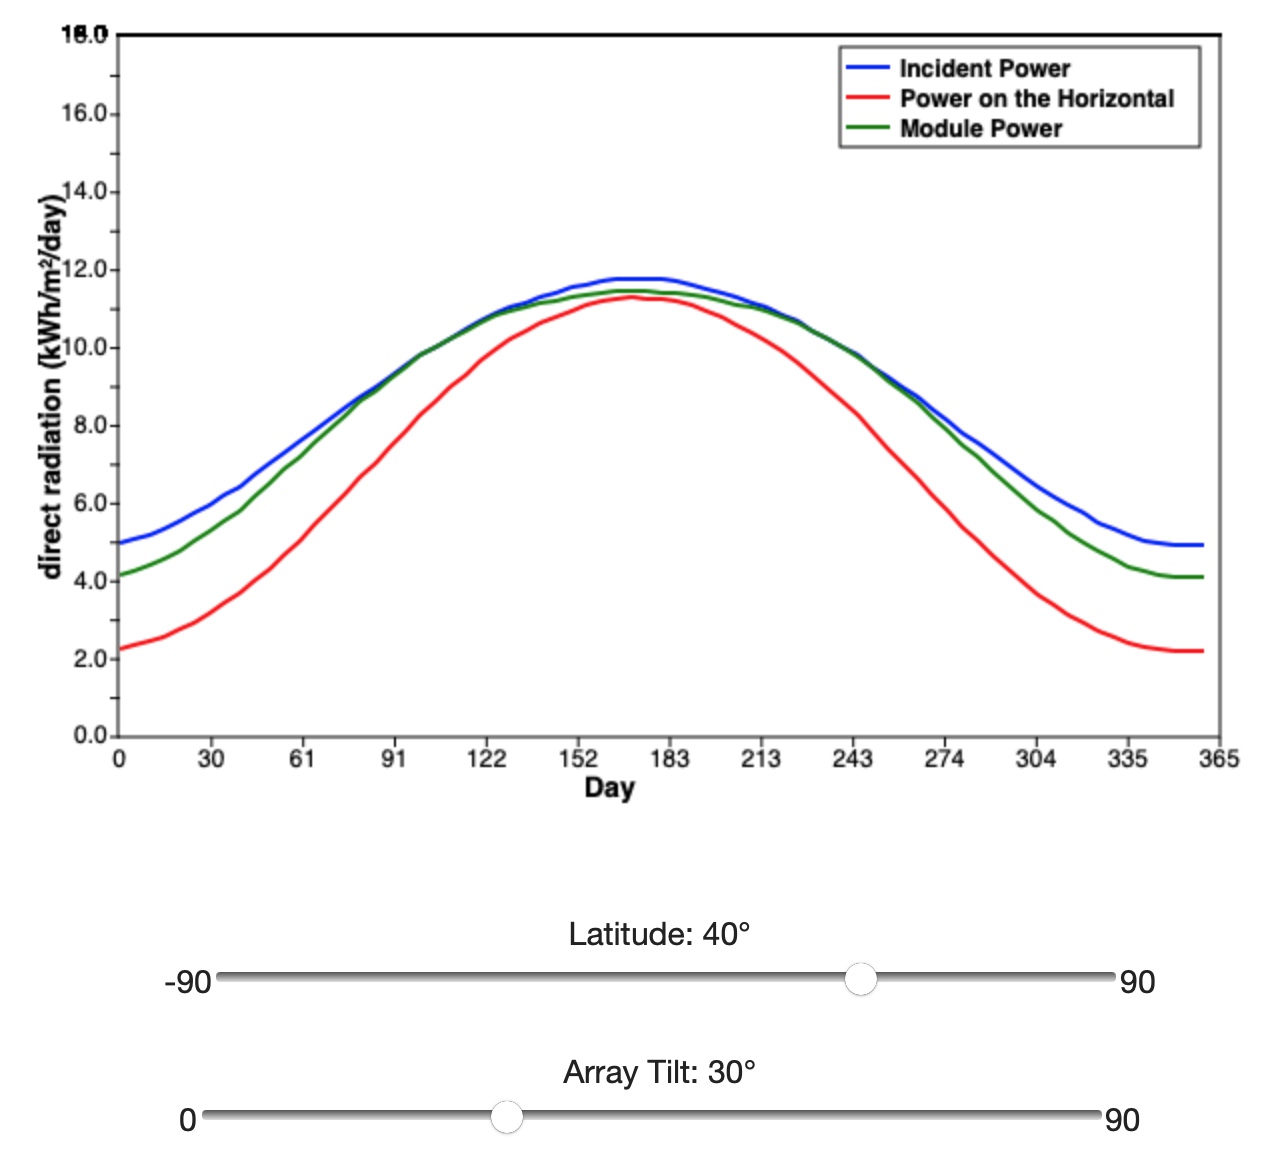
I found a wonderful site that allows you to play with solar radiation values without any of the sums at any latitude and any time of year. So I made this first wavy chart showing solar radiation vs day of year for Madrid. The blue line shows the maximum power if your panel is 90˚ to the sun. Roughly 5 to 12 kWh/m2/day variation. The red line is a panel that is horizontal, 11 to 2 kWh/m2/day variation. Finally, green which is a panel at 30˚ tilt. This panel is not far off from the blue and is a fairly good compromise for a fixed tilt angle.
At this point you say "Great, I'll angle the solar panel at 40˚ and great more power". You then realise that you need to drive along so, the tilt has to be stowable and lock in the two positions. "Not a big deal", and get on the roof to do it. "I was going to add a ladder and a sundeck anyway" you lie.
The next point is to realise that the sun moves across the sky during the day and the maxium solar power is around midday. To get maximum power all day you would need to constantly move your van to stay pointing directly at the sun. This of course will not happen. This works well in the solar farm we first talked about if it is very high tech.
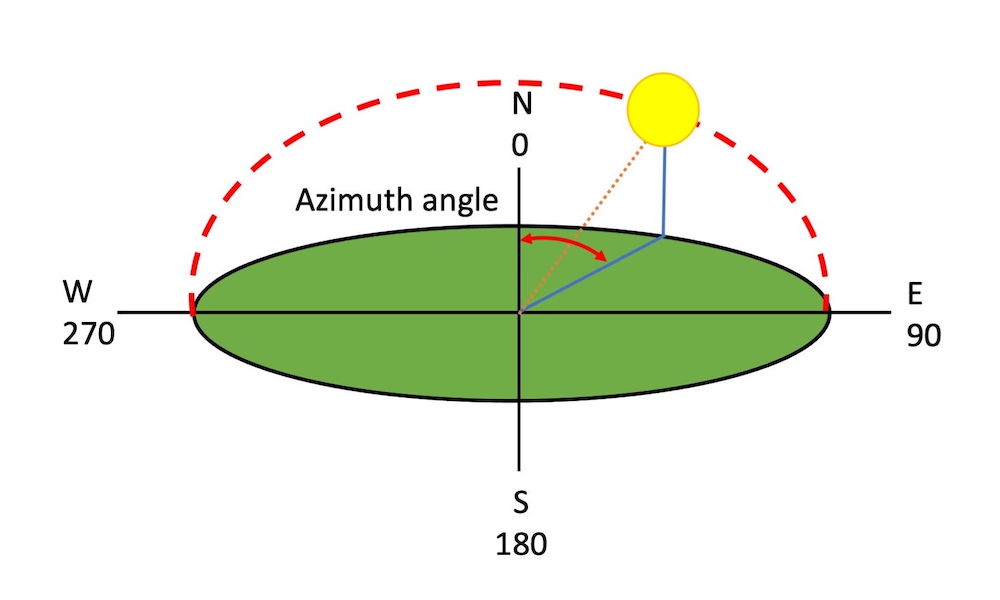
The azimuth angle is the angle the sun is from midday position.
As the sun moves across the sky the radiation level changes from early morning to late evening. The angle the sun hits your panel also changes as the sun rises in the sky and as you are in a fixed position facing south the angle becomes a compound angle between elevation and azimuth.
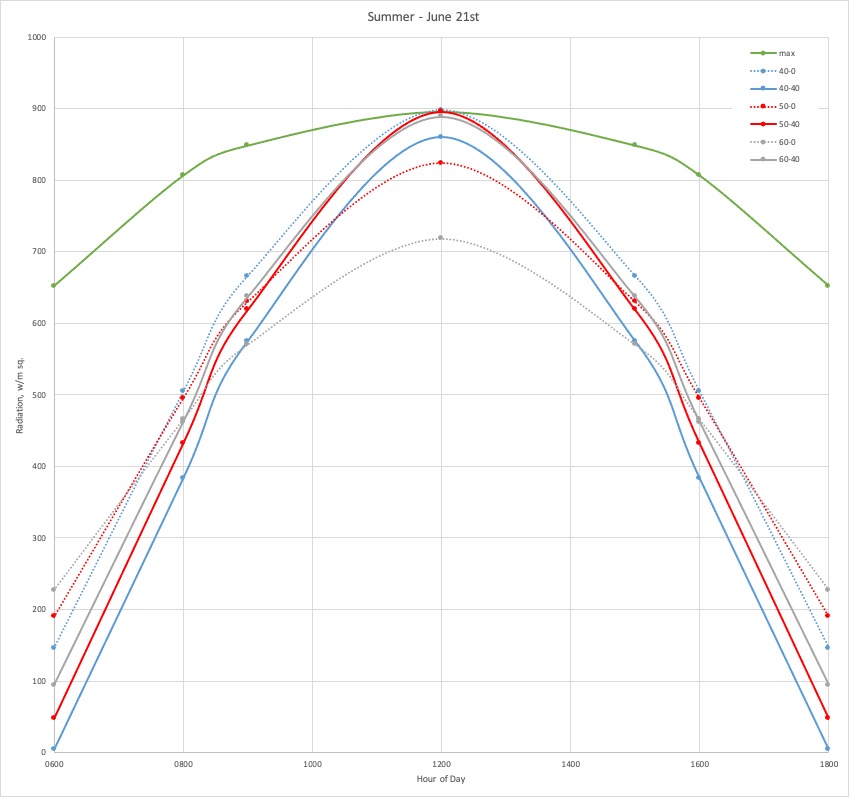
The final graph shows the calculations based on my three latitudes (blue 40, red 50 and grey 60) on 21st June (Summer) with a panel facing due south and placed at 40˚ (solid line) and horizontal (dashed line).
The green line is the solar radiation at 50˚.
What is striking is how the solar radiation hitting the panels drops off so rapidly either side of midday. The output of the panel will be 20% down 2 hours either side of midday. After 4 hours they are at 50%.
The area under the curve will give the total power for the day. As I can't be bothered to work that out I'll just estimate. The area for the red curve for horizontal and titled is almost the same and this is at the maximum power day in the year. In winter it will be slightly better for the tilted and it does get worse the further north you go. But horizontal panels are not that bad.
My final thought on why horizontal is the way to go is not due to it being easier but how many times do you park the van just so the solar panel can face south rather than you getting that view of the sea from the bed? Horizontal panels work the same whichever way round the van is parked (unless you are on a slope).
So 30% of maxium output is not an unfair assumption as we also get rainy and cloudy days so the radiation is almost all the time less than we would like. Also, it is always better to be surprised by how much charge you are getting than running out.
Windows and DVLA in UK
DVLA seems to have stopped allowing panel van conversions from re-registering as Motor Caravans.
Even if you think you have met all the requirements, the DVLA have the power just to say it doesn't meet the requirements without any explanation. So, all you get is a change to "Van with windows".
The DVLA does use rather woolly phrases that tend to suggest that if you want to get a camper van registered then it is good to have windows.
From the DVLA website -
"Motor caravan external permanent features
This list describes the external features which are commonly seen in motor caravans, and it is intended to provide guidance on what DVLA expects to see when considering your application:
2 or more windows on at least one side of the main body (this does not include windows on the driver or passenger doors) to provide a reasonable amount of daylight into the living accommodation windows are required."
We decided that we wanted to be able to:
1. See inside the van during the day without turning lights on.
2. To be able to see out when it’s raining.
3. Have some low-level ventilation without opening the doors.
Our Windows
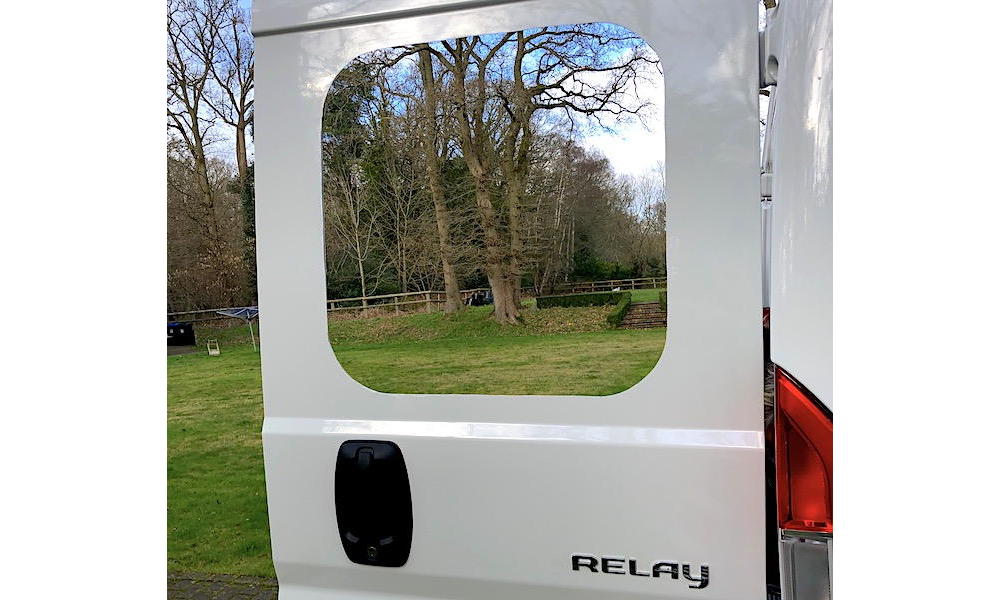
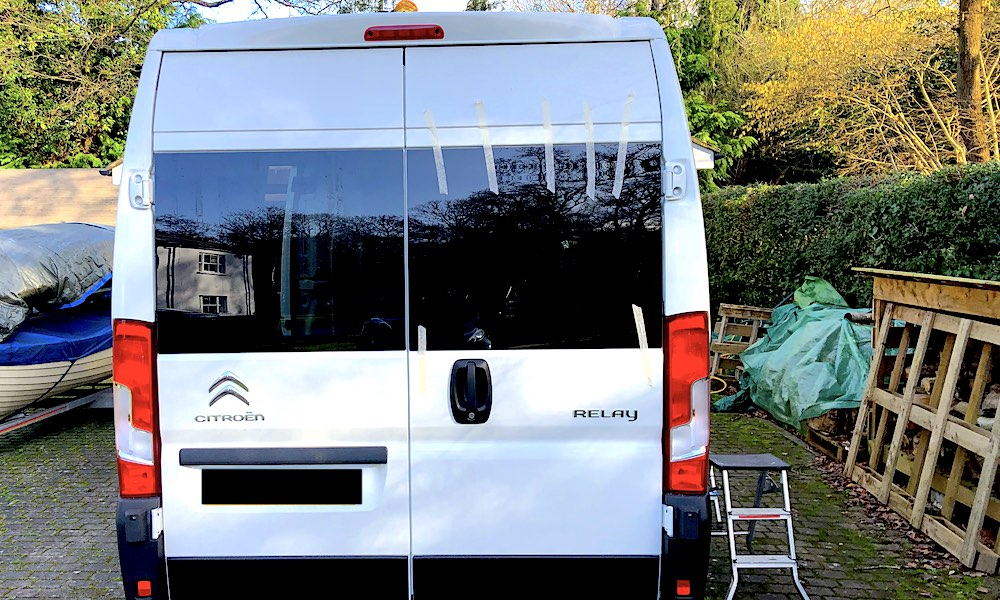
We decided on two rear fixed windows as our bed/table is at the back and we can look out in the mornings or while eating. At the front we went for two opening windows, one on the sliding side door and the other opposite. Our cooking area is at the front so this should help keep the odours down.
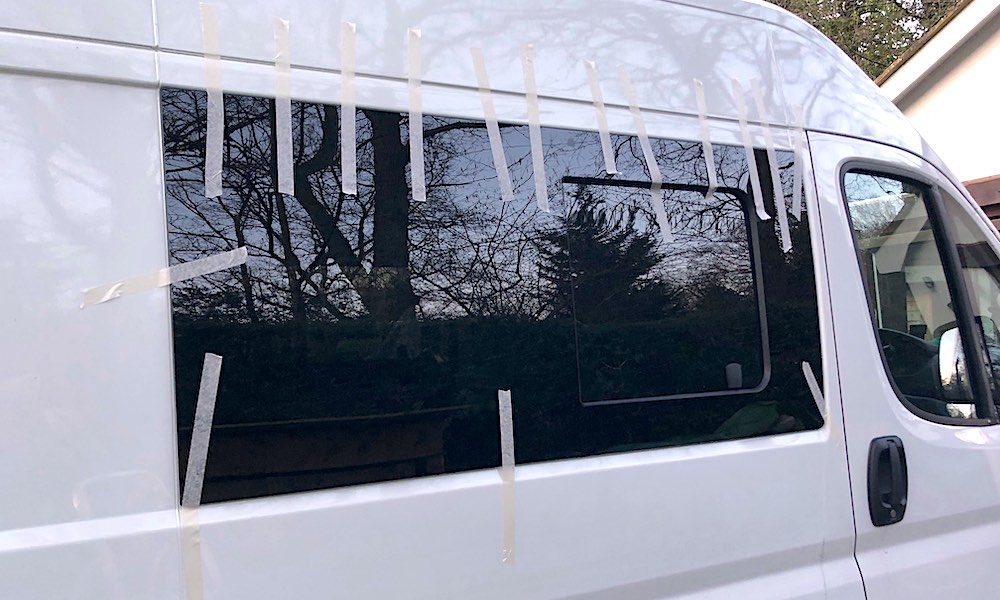
There are two types of windows. The sort you normally see on pre-built camper vans that have frames and tend to bulge out and open outwards or the flat bonded minibus style. We think on a van conversion the bonded flat windows look better and can be bought with a full dark tint (20-30% light transmissibility) which although reduces the light inside it also keeps the heat of the sun out. Dark tint glass also makes looking inside the camper more difficult, unless it is dark outside and you have the lights on!
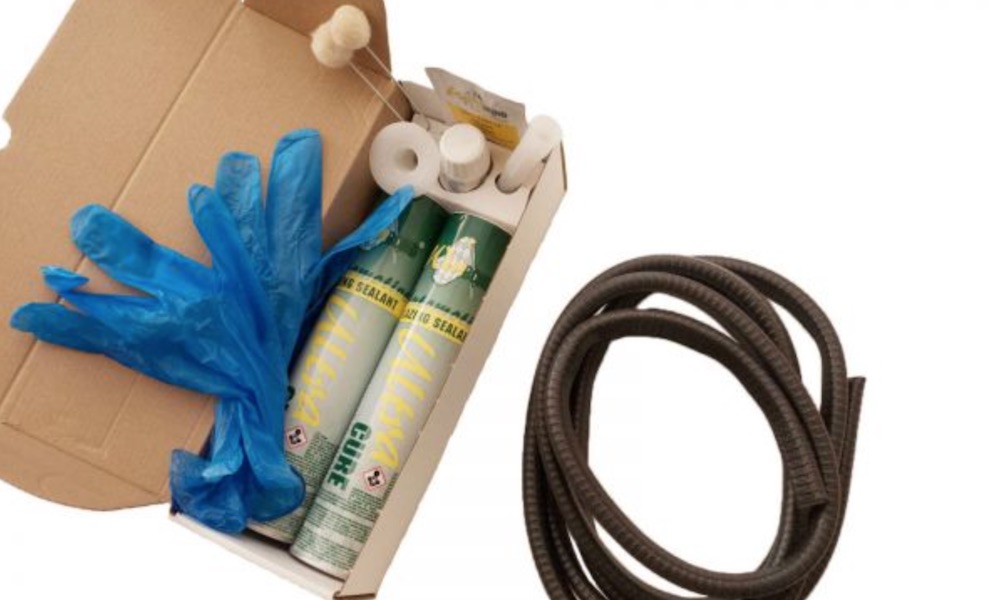
The windows generally come as a kit (or they can be ordered as the separate bits) with the stuff need to prepare the surface and bond them on. All you must do is cut a big hole in your nice new/new to you van. Clean up the edges, paint them (to help stop rusting) and apply the trim edging (not only does this make it look nice it also covers the horrible edges you have just made).
Follow the instructions on how to prepare the window and van for bonding on the glass. Generally, this will be an activator, primer and then adhesive on the glass with just primer on the van. Align correctly before pushing the glass on and make sure it is compressed around all the sides. The trim edging acts as a stop to make sure it is fully bedded down. Hold in place with tape for 30-60 minutes to allow it to cure or leave overnight. Then water test it for leaks, it is better to find out now than when you are half way through a build!
Now enjoy how bright the inside of your empty van now looks and you can now visualise a camper van rather than a builder's van.
Safety
There are certain regulations (legal requirements) that must be followed when converting a van to a camper van (DVLA also require certain things). There are also some caravan & Motorhome standards and trade practices, although are not legal requirements, it does make good sense to follow them as required.
Make sure you do your research and if in any doubt ask a professional. 240v AC and gas will be outside the range of many basic DIY enthusiasts and they can KILL - Be Safe and follow advice.
Personal safety seems obvious but I’ve seen enough in my working life and on YouTube to realise many people either don’t understand or choose to ignore basic safety.
